How to disable message requests on Instagram!
Anyone who uses Instagram frequently must have noticed that sometimes they receive a message from someone they have no idea who it is. Instead of showing up among the main chats, they get tagged as message requests on Instagram. Although some of these messages might actually be harmless, the truth is that most of them are spam or have improper content that no one wants to see.
Luckily, there’s an easy way for you to disable message requests on Instagram. Are you curious to learn how to do so on your profile on the social media platform? Then just check out our step-by-step guide down below!
How to disable message requests on Instagram!
Before we go any further, it is worth mentioning that we will do the tutorial on an iPhone running iOS 14.6, but the steps are the same as on Android. For that, just follow the guide on any smartphone you have Instagram and you shouldn’t face any issues.
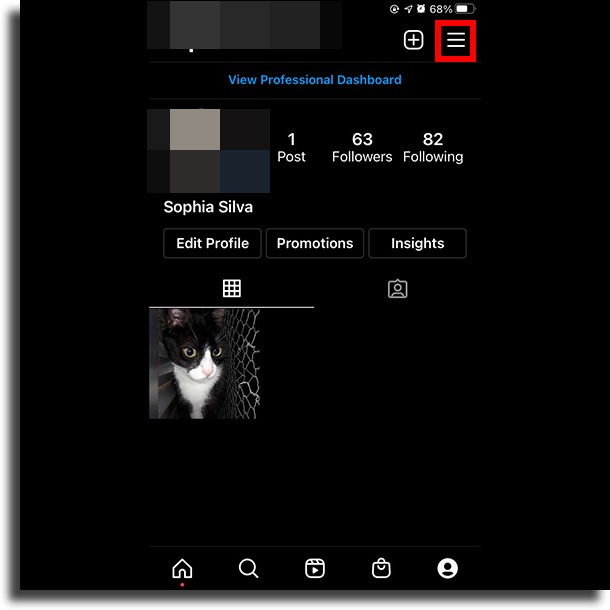
Step 1: to start, open up the Instagram app on your phone. Then, head on over to your profile and tap the three horizontal bars on the top-right corner of the screen.
Step 2: in the menu that pops up, tap on the Settings option so you can proceed to disable message requests on Instagram.
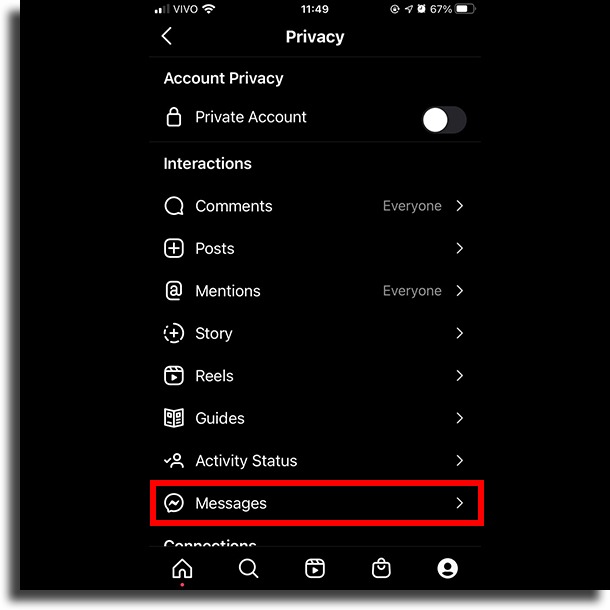
Step 3: In the new window, tap the Privacy option to proceed.
Step 4: you will see a few new different options regarding your account’s privacy. Tap Messages to proceed.
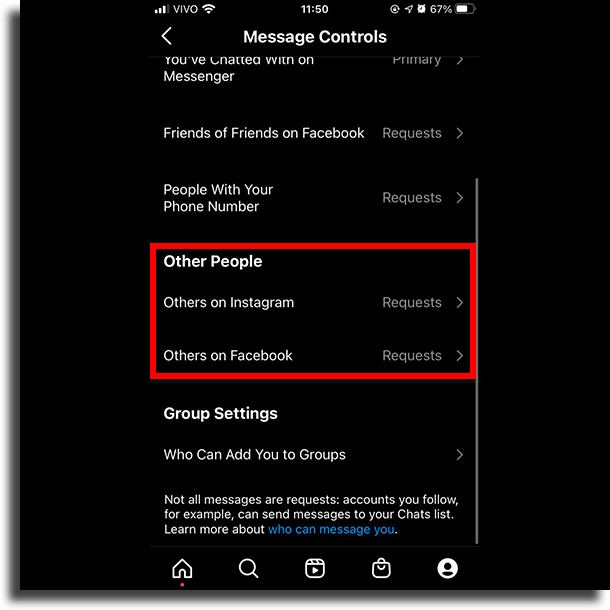
Step 5: under the Other people tab, you’ll see options for Others on Facebook and Others on Instagram. You can disable message requests on both social media or only on Instagram if you prefer. Tap them to proceed.
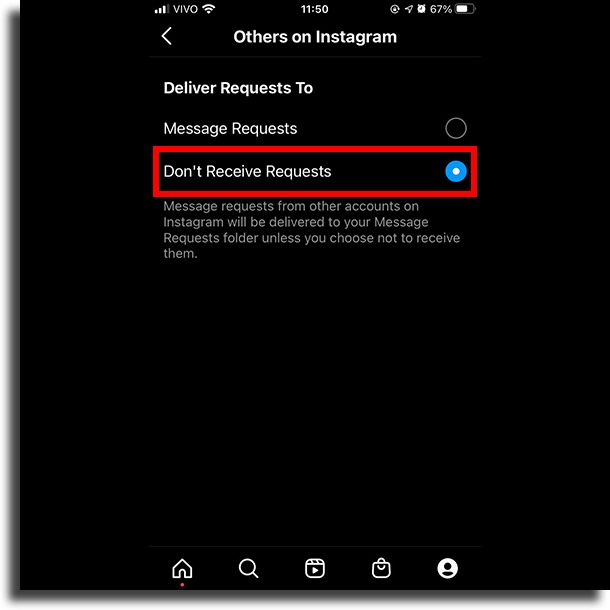
Step 6: When doing so, you’ll then need to tap Don’t Receive Requests. As we mentioned, you can do this only on Instagram or you can also disable message requests for Facebook!
Done. Now, you’ll have disabled the requests for Instagram. It actually is quite an easy thing to do, isn’t it?
Of course, if you prefer you can also undo everything you’ve just done by going back to the requests menu and letting them appear again. We only recommend that, should you do this, you shouldn’t click strange and unknown links received in these messages, as they might have malware or be a scam.
Did you like our tips?
So, were our tips helpful to you in learning how to disable them? Let us know in the comments your thoughts about our guide and if everything worked out right for you!


